2 tips to teach you how to play bar (barre) chords like a pro
We may earn commissions from the companies mentioned in this post. View our FTC disclosure for more information.
Bar (barre) chords are the bane of every beginning guitarist’s existence. They are frustrating to learn, difficult to play, and even more difficult to play correctly and cleanly with precision every time. In this post, I’m going to give you the two very best tips for how to play bar chords the right way! If you’d rather skip the reading you may visit my YouTube channel for the video on how to play bar chords, or scroll to the bottom of the page to watch it.
Tip One: Posture
Posture is not the first thing you might think about when practicing bar chords, but it’s essential to your success. Not only for playing bar chords, but everything you do as a guitarist. When playing a guitar, you must follow these rules for correct posture, and everything else will fall into place (providing you put in some practice time!).
- The mid-point of the guitar’s body should be mid-torso on your body. Think about placing the pickups of your electric guitar (or sound hole of your acoustic) at the bottom of your rib cage.
- The headstock of the instrument should be at eye level, causing a slight upward angle of the guitar’s neck.
These two placement tips will get the guitar in the correct position for proper playing. It’s not going to look super cool, like your favorite metal and rock & roll guitarists, but you’ll end up playing better than those guys if you follow my advice because you will not be straining your wrist. Try this: straighten your hand so there is no bend in your wrist and make a fist. Then bend your wrist 90 degrees and make a fist. Do you feel the tendon along the backside of your wrist stretching across your wrist bones? That is the cause of many repetitive motion injuries, and should be avoided at all costs. Placing your guitar in the position I’m suggesting will prevent you from that pain by putting your hand and wrist in a relaxed position, freeing the muscles and tendons of your fretting hand to do the work they need to do!
Tip Two: Finger placement
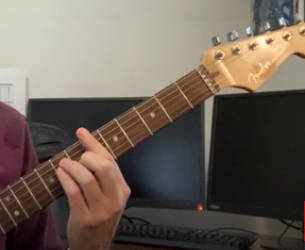
Sounds obvious, right? Just place your fingers in the right place and everything will work! Haha, there’s a little more to it than that. You’ve probably had a teacher or YouTube star tell you that you need to place your finger between the frets when fretting a note. This is bad advice, and I’ll explain why.
When fretting a note on the guitar (otherwise known as stopping a note against the fingerboard or fretboard), the job of the fret is to stop the pitch in a precise location. The job of your finger is to add pressure behind that location to get a good sound. If your finger is far away from the fret (or between them, in this case) your hand requires more strength to squeeze the string against that fret. It’s a simple matter of leverage. If you carefully place your finger directly behind the fret, without being on top of the fret, you will stop the pitch with far less required pressure.
Test it yourself by placing your index finger across all the strings of your guitar in multiple positions between the frets. Start with your finger all the way back toward the previous fret and attempt to get all the notes to ring out without buzzing. Then try right in the middle. Lastly, move it directly behind the fret that’s doing the work of raising the string off the fingerboard to clear the other frets, and you be the judge.
